Finding the Best Water Treatment in Las Vegas
September 15, 2022
We are taking ever necessary precaution with the CDC guidelines and wearing protective gloves, mask, booties, practicing safe distancing and using disinfectant cleaners to keep you and our team safe. If you have any questions or concerns please contact us at 702-737-1957.
Do you have problems with hard water? You have come to the right place because you will know what a water softener is and how to install it by the end of this read.
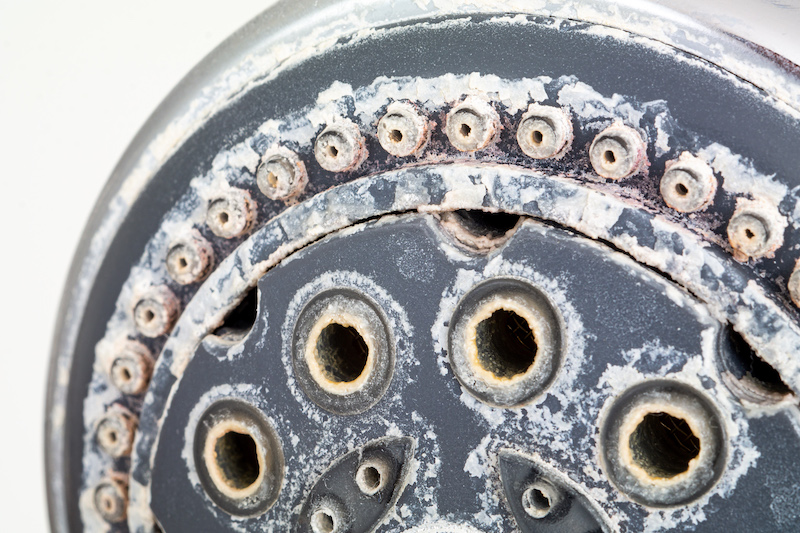
Hard water contains calcium and magnesium minerals; hence it can be a nuisance.
It reduces the efficiency of cleaning products and sticks to sinks, causes build up in faucets and pipes and reduces the lifespan of a water heater.
Studies indicate that 13 million households in the US suffer from hard water, and they spend more than two weeks every year cleaning and scrubbing lime stains from toilets and sinks.
However, hard water can be made soft using a water softener despite these challenges.
Before purchasing and installing a water softener, ensure you measure the levels of minerals in your hard water.
Professional contractors who specialize in water treatment and conditioning services can best be best done. If you live in Las Vegas, Serv-All Water Conditioning got you covered.
It is a filtration system that removes the calcium and magnesium minerals responsible for water hardness through ion exchange.
The softener contains a mineral tank with a bed of resins through which the hard water flows. The resins have sodium, making them negatively charged.

When the hard water passes through the bed of resins, the water will be neutralized, and the water will be softened.
Before installing water softening, ensure that the installation procedure adheres to the plumbing codes of your region.
The softener should be installed in a region out of the way but where it can be easily tied to the plumbing system.
The best places to install a water softener are in the basement, utility room, garage or near the water heater.
Remember not to install the softener in a place prone to freezing. This is because it risks permanent damage to the equipment.
Moreover, it should not also be placed outside or under direct sunlight. After you know where to install the water softener, it's time to install it.
Before you begin the installation process, ensure that the softener's area is clean and tidy.
Part of the tidying process is placing the water softener where you want it to be and measuring the connecting pipes.
Pay special attention to the orientation unit of the water softener such that the water supply pipe is next to the INLET and OUTLET next to the water heater where they will go, respectively.
The next step is to turn off the power heater and the house water supply valves. After this, open horse bibbs or the bottom floor faucets to drain any water remaining in the pipes.
Use a pipe cutter to cut into the water supply, then fix elbow fittings to run one line into the inlet and another to the outlet ports of the bypass valve.
This way, hard water will run into the inlet of the water softener and then the soft water will supply the taps and faucets of the house.
The pipes you will cut and install will run to the bypass valve. Ensure that before attaching the fittings to the plastic bypass valve, solder them to prevent damage.
Afterwards, run to a utility or drain sink. To prevent back siphoning of water, ensure the drain hose is 2 inches above the drain hole.

Also, remember to size the drain hose as per the run distance and its height as per the inlet.
In this step, ensure that the overflow tube is lower than the overflow fitting and as per the manufacturer's instructions.
Following this step, turn the water to run through the softener for a few minutes. This is to flush out any sediments and air out of the pipes.
Remember to open the valves that lead to the water heater and then restore their power. If needed, turn on the gas valve and relight the pilot.
Perform this step after plugging the unit into a receptacle. Afterwards, press and hold their generate button until the button goes back to 'Backwash'.
To prevent the control from advancing, turn off the power.
Open the inlet control gradually to expel any buildup of air.
After you see the water flowing steadily to the drain and there is no more spluttering, open the inlet fully and the outlet bypass controls.
Then fill the tank with water and add the salt as directed by the manufacturer.
After this, press the 'generate' button again and let the unit cycle to the next stage. Repeat until it reaches the 'service' setting.
Installing a water softener is not an easy task, and it requires a lot of precision.
If you live in Las Vegas and do not struggle to install your water softener, call Serv-All Water Conditioning Today.
They are water treatment experts based in Las Vegas with years of experience.

Serv-All Water Conditioning has various water softeners, and they will install whichever meets your needs and demands.
Don't hesitate to call them at (702) 737-1957 to get free quotes and service for all models and makes of water softeners.